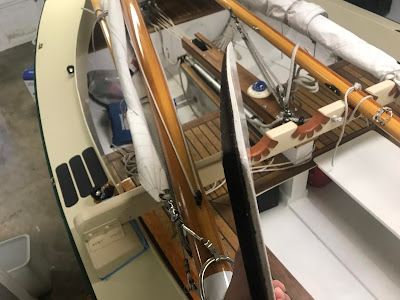
This blog is devoted to my John Welsford designed 15' Navigator yawl Ellie. I built her in my garage over a period of 18 months and launched her in 2011. She sports a sliding gunter main, roller furled jib and sprit-boomed mizzen. Her construction is glued-lapstrake over permanent bulkheads and stringers. This blog is a record of her construction and her voyages here in the Puget Sound area and (hopefully) a useful resource for fellow Navigator builders.

Monday, November 15, 2021

Full Size Template Kits for John Welsford's designs

The plans for John Welsford's designs are not drawn at full scale. One of the first tasks the builder will need to do is figure out how to go from 1/5 scale metric dimensioned drawings to full sized parts on plywood. The process usually involves drawing grids, interpreting the drawings, plotting points, fitting splines and interpreting curves. Parts can be drawn directly on the plywood, or by creating templates.  Usually by hand, unless you have experience using CAD systems. Either way, it can be a difficult, error prone, inaccurate and time consuming process for most builders.

I know because it took me, an experienced CAD user, nearly 3 weeks to create full sized templates for my Navigator build.

It's a task that every builder has to wrestle with.

Until now.


Working with John Welsford, I have been developing a set of Full Size Template Kits for many of his designs.

These printable template kits are available in Letter (8.5"x11"), Tabloid (11"x17"),  E (36" x 48") and in metric paper sizes A0, A3 and A4.  They are also available in roll-form (36" wide x 8-feet long).  You print the templates on an ordinary home laser or inkjet printer, assemble the pages and cut them out to create the templates.  Or take the PDF file to your local print shop and have them printed for you. Then simply trace the templates onto your plywood to get the full sized shapes.  Some kits may also include bonus items like nested parts (to save plywood), and plank drawings not included with the original plans.

These are great for anyone just starting their build.  They're a big time saver and are accurate.

Want a closer look?  You can download some free demo copies so you can see exactly how they work and "try before you buy" them.  Each kit includes detailed instructions on how to use them.  Although some pages have been omitted from these demo copies, you will still be able to see what is included in the full versions by looking at the table of contents and the page arrangement diagrams.  You will be able to print a template, assemble it, test it, and see how it all works, all for free.

Template kits are available for Navigator, Pathfinder, Sei, Tender Behind, Pilgrim, Longsteps, Scraps, Sherpa, Walkabout and Scallywag (coming soon).  Other designs are in work.  CNC cut files are also in work.

The template kits are now available for purchase as an instant digital download from Duckworks.  Or you can have Duckworks print and mail the roll-form sheets to you.  Here is the link:

https://duckworks.com/plans-kits/plans-by-type/full-size-patterns/

Friday, May 21, 2021

Daysailing Videos

Here are some videos I made from some of my local daysails.

During the summer, I daysail out of Everett, Washington once or twice a week on a regular basis. I've daysailed well over 1,000 miles here alone.

Possession Sound is an interesting place to sail.  It's got shipwrecks, whales, a navy base, the largest marina on the west coast, a large osprey nesting ground, a river estuary loaded with crab and salmon, tricky tides and currents, State and County parks, an indian reservation, beautiful views of mountain ranges all around, a private island, passenger ferries, and an island with sandy beaches that make you think you're in Hawaii.

I hope you enjoy these videos.  I plan on making more.  I'm a complete beginner at video making, so I apologize in advance for that.  But I hope you enjoy them nonetheless. 


Saturday, January 30, 2021

How to make a Sleeping Platform for Navigator

This is my design for a sleeping platform for my Navigator  I really like how these turned out and how well they work.  My son and I slept on these for a week during the Salish-100 cruise and they worked perfectly, so I’m excited to share them with you.

The platform occupies virtually no space when stored away and provides a sleeping area for one or two people when in use.

Stored position

The photo above shows the platform in its stored position.  The two panels store flush on the cockpit sole.  Note how the panels fit up against the keel batten, the seat fronts and the aft end of the centerboard case.  This locks them securely in place so they cannot move at all when you walk on them.

Sleeping position

This next photo above shows the panels in the sleeping position.  One or both can be used.  The panels are strong.  You can sit, lay, and even walk on them without breaking them.  Note there is a gap between them but it does not adversely affect their use.  In fact, it provides access to drop or retrieve small items into the footwell.  But be mindful not to allow them to slide together because they would lose the support provided along their outboard edges.

Underside

Here is a peek at the underside of one of the panels.  They are made from two pieces of plywood.  The underside piece of plywood is 1/2” thick and the topside piece of plywood is 1/4”.  The combined total thickness of 3/4” matches the thickness of the keel batten, making it lie flush when stored which eliminates any tripping hazard.  The dark strip along the edges is just a piece of felt that I glued on to protect my seat tops from scratches.

Construction
 

To make these all you’ll need is some ¼” and some ½” plywood.  The upper ¼” thick piece is cut to size and shape so it fits on the cockpit sole right up to the keel batten, right up to the seat fronts, and right up to the aft end of the centerboard case (see the first photo).

The lower ½” thick piece of plywood is cut to fit inside the footwell at seat-top level. In other words, right up to the front, back, and side of the seat top footwell opening.

The upper piece will be larger than the lower piece, assuming your seat-tops overhang the footwell.  If they don’t overhang, this entire project probably won’t work.

Attach the two pieces of plywood with glue and screws, but when you do you will want to bend them to a curve to match the contour of the cockpit sole.  You can see the curvature in this photo

Contour to match cockpit sole
 

A little bit of sanding and painting later and you'll be ready for some comfortable overnighters.

------------------------------------------------------------------------------------

Tim Ingersoll from Superior Wisconsin recently completed his sleeping platform for his beautiful Navigator Freidlor


Said Tim:

"They really took very little time to put together, when I put my mind to it. I oversize rough cut the 1/2" ply and simply placed that on top of the seats, then reached underneath to trace the curve of the seat edge. Once that was cut to shape, the 1/4" ply simply needed to be cut to fit in the sole of the boat, which was easy to measure out. Simple and fast."


"I didn't use felt to protect the seat tops, but am trying the rubberized paint under the lip and on top of the 1/4" (which will be the floorboard). I'm hoping that gives me a little grip under my feet and helps keep it in place when placed as sleeping platform. I do hate to recommend until I've had a chance to see how it holds up...but we'll see."


Tim's Navigator "Freidlor"

Here's wishing you many comfortable overnight adventures, Tim!