Need a sturdy little folding step ladder to get into your small boat? I built this one to replace my previous one that was cobbled together from 2x4 scraps. I used leftover oak hardwood flooring pieces that I got for free. I modified the plans slightly. I used pocket screws rather than dowels for the joinery and took advantage of the tongue and groove flooring to make the top step flat instead of using slats. This thing is solid as a tank and should last a long time. An excellent set of free plans is available from this link
TABLE OF CONTENTS
- Full Size Paper Patterns
- CNC files
- DIY Roller Furler
- DIY Jam Cleats
- DIY Boom Tent
- DIY Wooden Blocks
- DIY Folding Step Ladder
- DIY Tiller Lock
- DIY Wood & Leather Scoop Bailer
- Puzzle Joint Router Jig
- 3D Print Hardware
- Dinghy Cruising Packing List
- Is a Tabernacle Necessary?
- Laid Decking part 1
- Laid Decking part 2
- Nearshore Anchoring Methods
- Re-Boarding Straps
- Really Simple Sails
- Rigging my Sliding Gunter Yawl
- Self-Steering Yawls
- Setup Time
- ShopSmith Boatbuilding
- Sleeping Aboard
- Suzuki vs Honda 2hp Outboards
- Daysail Videos
- Build History
Monday, May 15, 2023
Super simple Shopsmith bandsaw fence
Today's project was a super simple and inexpensive fence for my bandsaw. I made it from douglas fir scraps, but any good quality 2x4 scraps cut square and true will do. The only expense was for the toggle clamp from Harbor Freight for $6, part number 96233. It hooks on one side of the table and clamps to the other.
How to improve Shopsmith Table Alignment
Saturday, January 28, 2023
Three "Nearshore Anchoring" methods for small boaters
During last year's Salish-100 small boat cruise, I did a presentation and demonstration of the three "Nearshore Anchoring" methods that I frequently use.
Nearshore Anchoring is a way of anchoring your boat in knee-deep water so you can go ashore while keeping your boat safe and accessible.
The three methods I presented are:
- The Bow-Drop method - a quick and easy method for brief lunch stops
- Clothesline anchoring - a longer term solution that copes with tidal changes quite well
- The Anchor Buddy - my favorite method that I use probably 90% of the time. It bridges the gap between the first two and works in most cases
If you would like a PDF copy of my presentation, click here.
Friday, March 11, 2022
Time for some new sails
Ellie's original sails are 12 years old. They were getting wrinkled, baggy, and the batten pockets are worn out. Time for a new set of sails!
My new set of sails were made by Really Simple Sails. They do fantastic work and I highly recommend them.
This also gave the the opportunity to make some improvements to my original sails. I'm not a sail designer, but I do own a copy of The Sailmaker's Apprentice, which I bought at the Port Townsend Wooden Boat festival directly from the author Emiliano Marino himself. He even autographed my copy. This book is fantastic. It contains more than anyone could ever want to know about sailmaking.
Ellie sports the gaff yawl mainsail shown on plan sheet NV12. This rig uses a horizontal, conventional boom. Even though I raised the gooseneck a bit higher on the mast, the boom still hits me in the head and sometimes it appears to droop.
My first improvement was to raise the clew by about 200 mm. That'll save my noggin, eliminate the droop, and I think it'll look more attractive when it resembles the trim of the jib and mizzen's foot. I also added a bit of a curve on the foot which I think looks nice.
Next, I changed the reef lines to run parallel to the boom. This was done so the boom remains at the same angle with each successive reef instead of angling higher with each one. This will improve safety by keeping the boom within reach when tying in a reef.
The biggest change on the mainsail was with the battens. The top two battens were full length and are angled relatively horizontal. Every time I furled and unfurled the main I would have to remove or insert these battens. This was very annoying, unsafe, and wore out my batten pockets. My improvement is to angle the top two battens towards the throat. Now I can drop the main into the lazyjacks on the boom without having to remove the battens at all. I also made all four battens the same length for convenience. In fact, I now leave all four battens in the sail permanently. After dropping the main, I simply bundle the gaff, sail, and boom together and slide the whole affair into a sail bag. I leave the outhaul and reefing lines attached too. This reduces my setup and take-down time quite a bit.
My original sails are made from 6 oz cloth. They were heavy. This time I'm went with lighter weight 4 oz cloth to reduce the weight and because the winds where I sail are generally mild.
As for the jib, I enlarged it just a bit. I noticed that the dimensions for the jib, as shown on the plans, do not match the jib as drawn. The jib as drawn is slightly larger. It's not much of a difference, but Ellie has sufficient weather helm so why not. The new jib will have a wire luff for roller furling, as does the current jib. This also allows me to see the foot of the jib where it was always hidden from view behind the mainsail.
And finally, the mizzen is unchanged, except I angled the battens slightly so it looks like the main sail.
Here are my sail plan drawings in case you're interested.
You can download my new sail plans here. (1.8 MB PDF)
Monday, November 15, 2021
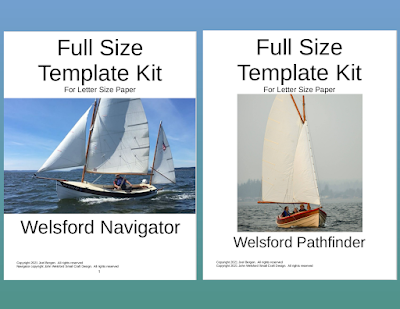
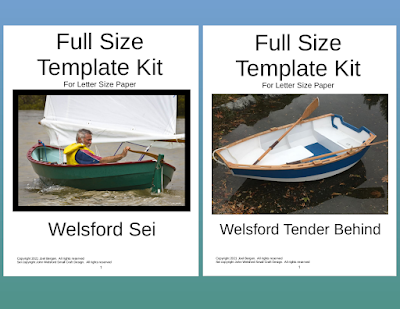
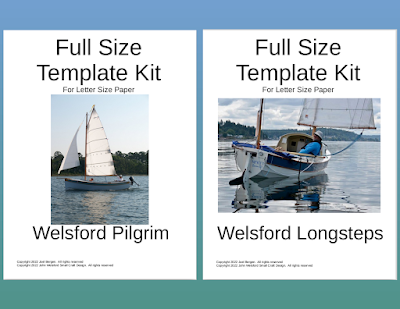
Full Size Template Kits for John Welsford's designs
I know because it took me, an experienced CAD user, nearly 3 weeks to create full sized templates for my Navigator build.
It's a task that every builder has to wrestle with.
Until now.
Working with John Welsford, I have been developing a set of Full Size Template Kits for many of his designs.
These printable template kits are available in Letter (8.5"x11"), Tabloid (11"x17"), E (36" x 48") and in metric paper sizes A0, A3 and A4. They are also available in roll-form (36" wide x 8-feet long). You print the templates on an ordinary home laser or inkjet printer, assemble the pages and cut them out to create the templates. Or take the PDF file to your local print shop and have them printed for you. Then simply trace the templates onto your plywood to get the full sized shapes. Some kits may also include bonus items like nested parts (to save plywood), and plank drawings not included with the original plans.
These are great for anyone just starting their build. They're a big time saver and are accurate.
Want a closer look? You can download some free demo copies so you can see exactly how they work and "try before you buy" them. Each kit includes detailed instructions on how to use them. Although some pages have been omitted from these demo copies, you will still be able to see what is included in the full versions by looking at the table of contents and the page arrangement diagrams. You will be able to print a template, assemble it, test it, and see how it all works, all for free.
Template kits are available for Navigator, Pathfinder, Sei, Tender Behind, Pilgrim, Longsteps, Scraps, Sherpa, Walkabout and Scallywag (coming soon). Other designs are in work. CNC cut files are also in work.
The template kits are now available for purchase as an instant digital download from Duckworks. Here is the link: https://duckworks.com/plans-by-designer/john-welsford/
Friday, May 21, 2021
Daysailing Videos
Here are some videos I made from some of my local daysails.
During the summer, I daysail out of Everett, Washington once or twice a week on a regular basis. I've daysailed well over 1,000 miles here alone.
Possession Sound is an interesting place to sail. It's got shipwrecks, whales, a navy base, the largest marina on the west coast, a large osprey nesting ground, a river estuary loaded with crab and salmon, tricky tides and currents, State and County parks, an indian reservation, beautiful views of mountain ranges all around, a private island, passenger ferries, and an island with sandy beaches that make you think you're in Hawaii.
I hope you enjoy these videos. I plan on making more. I'm a complete beginner at video making, so I apologize in advance for that. But I hope you enjoy them nonetheless.