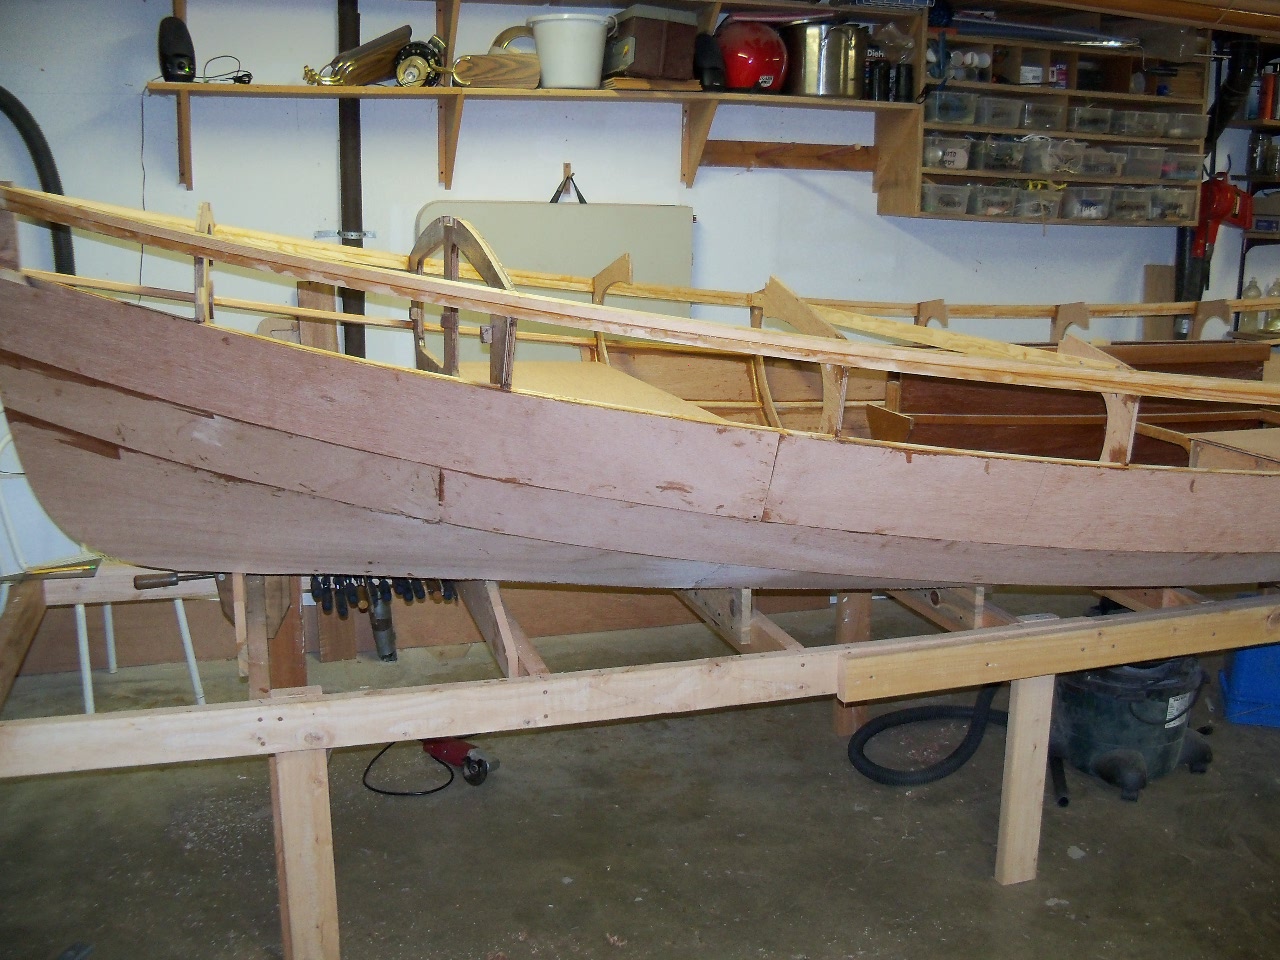
Tonight I cut two more holes in the transom. A 1" drain hole, and a square hole for the boomkin.
That makes a grand total of 17 perforations through my transom. Six for the Duckworks motor mount, eight holes for the gudgeons, and three more for the tiller, boomkin and drain! I hope the boat will still float despite all these holes!
Another challenge was how to trim all the planks flush with the transom. I thought about using a saw but was afraid of scratching the surface of the transom and chipping the planks. Then I thought I'd carefully whittle away at them with a sharp chisel. That would have taken forever. I ended up using the Gain Machine
I set the Gain Machine so that the router bit was flush with the bottom of the base, like this:
Then, holding the base firmly against the transom, I used the Gain Machine to route the protruding planks flush with the transom.
The planks were perfectly flush a few minutes later.
This blog is devoted to my John Welsford designed 15' Navigator yawl Ellie. I built her in my garage over a period of 18 months and launched her in 2011. She sports a sliding gunter main, roller furled jib and sprit-boomed mizzen. Her construction is glued-lapstrake over permanent bulkheads and stringers. This blog is a record of her construction and her voyages here in the Puget Sound area and (hopefully) a useful resource for fellow Welsford boat builders.
TABLE OF CONTENTS
- Full Size Paper Patterns
- CNC files
- DIY Roller Furler
- DIY Jam Cleats
- DIY Boom Tent
- DIY Wooden Blocks
- DIY Folding Step Ladder
- DIY Tiller Lock
- DIY Wood & Leather Scoop Bailer
- Puzzle Joint Router Jig
- 3D Print Hardware
- Dinghy Cruising Packing List
- Is a Tabernacle Necessary?
- Laid Decking part 1
- Laid Decking part 2
- Nearshore Anchoring Methods
- Re-Boarding Straps
- Really Simple Sails
- Rigging my Sliding Gunter Yawl
- Self-Steering Yawls
- Setup Time
- ShopSmith Boatbuilding
- Sleeping Aboard
- Suzuki vs Honda 2hp Outboards
- Daysail Videos
- Build History
Wednesday, October 27, 2010
Monday, October 25, 2010
Planking Complete!
We passed another major milestone this weekend - installation of the final plank - the sheer strake.
WoooHooo!
I decided to minimize the number of splices in this strake, because I am hoping it will look good enough to varnish. Since the Navigator is a 15' boat, I was just barely able to make the sheer strakes using one scarf joint in the middle. I figure one splice looks better than two.
I tried to do the best job I could with the scarf joints. They look nice and clean but I won't know for sure until after they're faired and a coat of epoxy is applied. If it doesn't look good, I can always paint it or apply a vaneer.
But for now, time for a beer!
WoooHooo!
I decided to minimize the number of splices in this strake, because I am hoping it will look good enough to varnish. Since the Navigator is a 15' boat, I was just barely able to make the sheer strakes using one scarf joint in the middle. I figure one splice looks better than two.
I tried to do the best job I could with the scarf joints. They look nice and clean but I won't know for sure until after they're faired and a coat of epoxy is applied. If it doesn't look good, I can always paint it or apply a vaneer.
But for now, time for a beer!
Tuesday, October 12, 2010
Planking away
Work has slowed a bit as we move into the rainy season here in the Pacific Northwest. Not only are the days getting shorter, colder and wetter, but I'm back to working overtime. *sigh*
Nevertheless, I'm glad to say that I am making some progress.
I've got most of the third row of planking on.
I've fitted the anchor well floor, the front seat, and started fitting the rear side seats. It's a good idea to cut these to size before installing the third row of planking. It's much easier to fit them in place over sized and scribe the outer hull position using a batten then to try and fit them later.
I have learned two valuable lessons this time around:
Lesson #1. Carefully inspect your plywood, no matter how good it's supposed to be. After installing part of my starboard plank, I noticed that something looked odd at one of the edges. Closer inspection revealed this:
.
Yikes! About a half inch of the edge of this sheet of plywood didn't get bonded properly. I'm using Aquatek BS-6566 marine plywood and I've built two boats using this stuff, and this is the first time I've run across a flaw like this. I had to trim a half inch from the forward edge of one of my planks, which was already installed, to get rid of the bad edge. I'm inspecting every piece from now on.
Lesson#2: When installing the planks, it's easy to clamp them along the top edge, but the bottom edge has to be fastened with screws, which are removed after the epoxy cures. This leaves a line of ugly screw holes that has to be plugged and sanded. I started doing it this way but then I found a better way. Now I use my PowerShot staple & nail gun loaded with 1/2" nails.
This stapler has just enough power to drive these tiny little nails most of the way through a 1/4" sheet of plywood and into the underlying stringer. To install the plank, I goop the stringers up with "peanut butter", clamp the plank in place along the top, then press firmly along the bottom and drive in a nail every few inches or so.
The little nails are easily pulled later on with a pair of pliers, leaving just a little pinhole. The only downside is that the stapler has a tendency to jam but it still beats using screws by a long shot IMHO.
Nevertheless, I'm glad to say that I am making some progress.
I've got most of the third row of planking on.
I've fitted the anchor well floor, the front seat, and started fitting the rear side seats. It's a good idea to cut these to size before installing the third row of planking. It's much easier to fit them in place over sized and scribe the outer hull position using a batten then to try and fit them later.
I have learned two valuable lessons this time around:
Lesson #1. Carefully inspect your plywood, no matter how good it's supposed to be. After installing part of my starboard plank, I noticed that something looked odd at one of the edges. Closer inspection revealed this:
.
Yikes! About a half inch of the edge of this sheet of plywood didn't get bonded properly. I'm using Aquatek BS-6566 marine plywood and I've built two boats using this stuff, and this is the first time I've run across a flaw like this. I had to trim a half inch from the forward edge of one of my planks, which was already installed, to get rid of the bad edge. I'm inspecting every piece from now on.
Lesson#2: When installing the planks, it's easy to clamp them along the top edge, but the bottom edge has to be fastened with screws, which are removed after the epoxy cures. This leaves a line of ugly screw holes that has to be plugged and sanded. I started doing it this way but then I found a better way. Now I use my PowerShot staple & nail gun loaded with 1/2" nails.
This stapler has just enough power to drive these tiny little nails most of the way through a 1/4" sheet of plywood and into the underlying stringer. To install the plank, I goop the stringers up with "peanut butter", clamp the plank in place along the top, then press firmly along the bottom and drive in a nail every few inches or so.
The little nails are easily pulled later on with a pair of pliers, leaving just a little pinhole. The only downside is that the stapler has a tendency to jam but it still beats using screws by a long shot IMHO.
Thursday, September 23, 2010
The Gain Machine
Before the next set of panels can be installed, there is some prep work to do. First, I had to mark where the bottom of the next panel will go so that I could cut the bevel in the lower panel. The panels overlap by 20mm which is the same width as the stringers. I made this simple jig with a pointer that rides along the top of the stringer and it holds a pencil 20mm away that draws the line on the lower panel.
The bevel has to go from this line the stringer above it.
I cut this bevel by aligning the two stringers and the plane by sight. Plane off some material and frequently check the progress.
Keep planing away material until the bevel reaches the line and it looks like this:
Making the remaining planks is similar to the way we made the garboard plank. First we measure the greatest width between the stringers and add about 50mm. Measure the desired length and add about 50mm. Cut a rectangular piece of plywood to that size. Clamp it to the boat. Trace the upper edges of both stringers onto the panel. Remove the panel. Offset the lower curve by an additional 20mm so that the lower edge of the panel will align with the lower edge of the bevel. Cut the panel to the profile. Fair the lower edge of the panel nice and smooth. Epoxy the panel to the boat.
Cutting Gains
At the bow, the overlap between the two panels blend together with a tapered half-lap joint called a "gain". Gains can be cut many different ways. Often they are cut by hand using a saw followed by a chisel and finished off with a rabbet plane. I decided to cut the gains using a router, and I cut them in the panels before installing them on the boat. I didn't have much confidence in my ability to cut them by hand and I knew a router would be much faster and more accurate.
To use a router to cut the gains, I first had to come up with a jig. This is the jig, which I call "The Gain Machine".
The jig is made from two scraps of wood. The lower piece is made from 3/4" (20mm) stock and it has one pointed end cut at 45 degree angles, which I'll refer to as "the pointer". The pointer rides along the edge of the panel to control the width of the gain.
The other piece is made of a scrap of 1/4" (6mm) plywood. The base for the router is attached to one end. It has two slotted holes for screws and washers that attach it to the lower piece and allow the position of the pointer to be adjusted. The router is a trim router that I got from Harbor Freight Tools on sale for $20.
After assembling the two pieces, put a 3/4" (20mm) diameter straight router bit into the router. If you don't have a 3/4" bit, a smaller bit could be used but you would need to cut the gain in multiple passes. Adjust the pointer so the distance from the tip of the pointer to the far side of the bit is equal to the desired width of the gain. In my case, the bit and gain are both 3/4" so the pointer just contacts the bit.
Set the depth of the bit so that the bottom of the bit is raised up by an amount equal to the thickness of the plywood panel (1/4" or 6mm in my case).
Now the jig is ready to cut gains. Here is a video of the Gain Machine in action.
I don't see how cutting gains could be any quicker or easier than this!
Wednesday, September 15, 2010
Chapter 9: A tale of 2 planks
It was the best of planks, it was the worst of planks...
Sorry Charles.
The garboard plank on the Navigator is in many ways the easiest plank, and also the hardest to install. The aft half of the plank is quite flat. It is spliced together with nice friendly butt blocks - no scarfing is necessary. The plank is quite uniform in width. The entire lower edge of the plank is attached to the lower panel using the ever popular stitch-and-glue technique.
The forward half of the plank is a another story. It makes a near 90 degree twist while curving around the bow and increasing in width, culminating with an attachment to a contoured stem with a rolling bevel.
Let's start with the easy part.
Here is a section of the garboard plank from the transom through bulkhead 7. To make the plank, first we measure the greatest width between the bottom panel and the stringer and add about 50mm. Measure the length and add about 50mm. Cut a rectangular piece of plywood to that size. Clamp it to the boat. Trace the profile of the lower plank and stringer onto the panel. Cut the panel to the profile. Epoxy the panel to the boat. The joint between the lower panel and the plank gets stitch-and-glued, which means it is temporarily stitched to the lower panel with wire ties or bailing wire, dabs of epoxy are applied between the stitches. When the epoxy dabs cure, the stitches are removed, a fillet of epoxy/wood flour is applied over the joint, which is then covered with fiberglass tape and epoxy. There are two splices in the panel. Both splices are hidden under the seats, so there is no need to bother with scarfing the plywood joints. Simple "butt blocks" are glued over the top of the joint, held in place with temporary screws until the epoxy sets.
At the bow, the panel has to twist from near horizontal to vertical
It's hard to believe that plywood can actually do this, but it can.
The drill starts out much the same as before. Cut out an oversized panel and clamp it to the boat, slowly and carefully bending it into position so it can be traced to actual size and then be installed.
So first we clamp it in place at the aft end, making sure we overlap the lower panel, stringer, and the aft panel.
Then we work our way forward, applying more clamps and carefully and evenly apply pressure to the panel.
At this point I noticed that the panel was riding quite hard on the front, lower edge of the stem. I forgot to take a photo, but you can see what I'm talking about in this diagram. I had to remove the panel and plane off some additional material in this area until the panel fit properly.
Keep working your way forward. Avoid using clamps between the panel and the stringer. Quite a bit of force is required to bend the panel. The stringers will deform under that much force. I mostly used spreader clamps between the building jig and the panel to press it into place. Once the panel was in place, I added clamps to the stringers to pull the panel in the final fraction of an inch.
Another shot of the spreader clamps.
Finally the panel is in position. Now trace around the lower panel, the stem, and the stringer onto the garboard panel.
Remove the panel and cut it to the traced profile.
Re-install the panel and re-clamp it to its final position. Stitch the garboard panel to the lower panel. Bailing wire or copper wire stitches work better than plastic ties in this area.
Glue the panel in place and repeat for the other side.
All I have left to do is finish the stitch and glue fillets and tape, and add the butt straps.
Sorry Charles.
The garboard plank on the Navigator is in many ways the easiest plank, and also the hardest to install. The aft half of the plank is quite flat. It is spliced together with nice friendly butt blocks - no scarfing is necessary. The plank is quite uniform in width. The entire lower edge of the plank is attached to the lower panel using the ever popular stitch-and-glue technique.
The forward half of the plank is a another story. It makes a near 90 degree twist while curving around the bow and increasing in width, culminating with an attachment to a contoured stem with a rolling bevel.
Let's start with the easy part.
Here is a section of the garboard plank from the transom through bulkhead 7. To make the plank, first we measure the greatest width between the bottom panel and the stringer and add about 50mm. Measure the length and add about 50mm. Cut a rectangular piece of plywood to that size. Clamp it to the boat. Trace the profile of the lower plank and stringer onto the panel. Cut the panel to the profile. Epoxy the panel to the boat. The joint between the lower panel and the plank gets stitch-and-glued, which means it is temporarily stitched to the lower panel with wire ties or bailing wire, dabs of epoxy are applied between the stitches. When the epoxy dabs cure, the stitches are removed, a fillet of epoxy/wood flour is applied over the joint, which is then covered with fiberglass tape and epoxy. There are two splices in the panel. Both splices are hidden under the seats, so there is no need to bother with scarfing the plywood joints. Simple "butt blocks" are glued over the top of the joint, held in place with temporary screws until the epoxy sets.
At the bow, the panel has to twist from near horizontal to vertical
It's hard to believe that plywood can actually do this, but it can.
The drill starts out much the same as before. Cut out an oversized panel and clamp it to the boat, slowly and carefully bending it into position so it can be traced to actual size and then be installed.
So first we clamp it in place at the aft end, making sure we overlap the lower panel, stringer, and the aft panel.
Then we work our way forward, applying more clamps and carefully and evenly apply pressure to the panel.
At this point I noticed that the panel was riding quite hard on the front, lower edge of the stem. I forgot to take a photo, but you can see what I'm talking about in this diagram. I had to remove the panel and plane off some additional material in this area until the panel fit properly.
Keep working your way forward. Avoid using clamps between the panel and the stringer. Quite a bit of force is required to bend the panel. The stringers will deform under that much force. I mostly used spreader clamps between the building jig and the panel to press it into place. Once the panel was in place, I added clamps to the stringers to pull the panel in the final fraction of an inch.
Another shot of the spreader clamps.
Finally the panel is in position. Now trace around the lower panel, the stem, and the stringer onto the garboard panel.
Remove the panel and cut it to the traced profile.
Re-install the panel and re-clamp it to its final position. Stitch the garboard panel to the lower panel. Bailing wire or copper wire stitches work better than plastic ties in this area.
Glue the panel in place and repeat for the other side.
All I have left to do is finish the stitch and glue fillets and tape, and add the butt straps.
Tuesday, September 7, 2010
Chapter 8: Stringers
Yesterday I finished installing the stringers. Well, sorta finished. There are actually two more stringers to install that form the inner edge of the side decks, but they don't get installed until after the planking and seat tops are installed. It seems like they could be installed now. But now that I have shop space, I figured I'd try to actually start building things in the proper order for a change.
Anyhow, installing the (let's call them Outer Stringers) was rather uneventful. I bought several clear douglas fir boards from Lowes for a fraction of the price that the lumber yards wanted. They were nice clear boards, straight grained without a single knot or split. I proceeded to rip them into 3/4" (20mm) square strips (for the gunwale stringers) and 20mm x 15mm strips for the remaining stringers. I then scarfed them and epoxied them together with epoxy/silica mix to form 20 foot long stringers.
I had three concerns about the stringers, after reading other builders' blogs.
I just jumped right in and torqued and twisted the stringers into place at the stem, fully expecting them to break, but they didn't.
For the gunwale stringers, I took the advice of other builders and made the stringer from two seperate 20mm x 20mm stringers. Again, they went right in without a hitch.
Spooky.
So I guess tomorrow I'll start planking.
Anyhow, installing the (let's call them Outer Stringers) was rather uneventful. I bought several clear douglas fir boards from Lowes for a fraction of the price that the lumber yards wanted. They were nice clear boards, straight grained without a single knot or split. I proceeded to rip them into 3/4" (20mm) square strips (for the gunwale stringers) and 20mm x 15mm strips for the remaining stringers. I then scarfed them and epoxied them together with epoxy/silica mix to form 20 foot long stringers.
I had three concerns about the stringers, after reading other builders' blogs.
- Occasionally a stringer will split or break when attempting to bend it near the bow.
- Often it is very difficult to twist the stringer near the bow to fit up with the stem.
- The gunwale stringer, which is 40mm x 20mm, can be particularly difficult to bend, and may even require steaming.
I just jumped right in and torqued and twisted the stringers into place at the stem, fully expecting them to break, but they didn't.
For the gunwale stringers, I took the advice of other builders and made the stringer from two seperate 20mm x 20mm stringers. Again, they went right in without a hitch.
Spooky.
So I guess tomorrow I'll start planking.
Boatbuilding with the Shopsmith
If you have a small shop, as many of us do, how do you cram in a table saw, a drill press, a lathe, a disk sander, a jointer, a band saw, a horizontal boring machine, an over-table router, and a thickness planer and still have room to breathe?
The answer is, with a Shopsmith
The Shopsmith multi-purpose tool can do all that, and a whole lot more, for a lot less than buying all of those tools seperately. Not only that, but you can buy a used Shopsmith for about the cost of only one of those tools, fix it up, use it for years, and pass it down to your grandkids someday for them to use.
The Shopsmith has been around, in various forms, since the first model 10ER built by Magna was sold by Montgomery Ward in 1947. An improved Mark II was introduced in the 1950's, followed by the Mark VII with lots of extras including the ability to tilt in both directions and included a built in vacuum. But the most popular and most versitile model is the current Mark V. Production ceased in the early 1960's due to a variety of changes within the company and the buying public, but production resumed in 1973 under a new company - Shopsmith Inc. Over 1,000,000 Shopsmiths have been sold.
The Shopsmith is built to last - essentially forever. Every part, down to the individual screws, can be ordered as replacement parts directly from Shopsmith. The entire machine is made of cast aluminum and steel. It's difficult to find a plastic part on the machine anywhere. Service manuals, operation manuals, videos, even instructions on how to refurbish a used machine are all available from Shopsmith. Compare that to most other power tools sold today. When something breaks on them, their next destination is usually the landfill.
New Shopsmith's are not cheap - not surprising for a machine built to last a lifetime. They start out at about $3,300 for the base model, but used Shopsmiths can be found, sometimes very inexpensively. I purchased my Shopsmith model 510 complete with the bandsaw and jointer accesories, for $350 from a gentleman on Craigslist. The machine was about 12 years old. It had only been used a few times before it was stored unused in a barn for about 10 years. The machine was missing some parts and parts of the machine were rusty. I paid another $150 to replace the parts that were missing or that needed replacement, and spent several days cleaning off the rust. I overhauled the headstock, following the instructional videos provided by Shopsmith. The headstock was in great shape except for one part in the speed controller. The rust on the way tubes came off pretty easily with fine sandpaper. After the overhaul I spent several hours adjusting the machine so that it cut square and true. I now have a Shopsmith which is as good as new, for $500 and about a week's worth of elbow grease.
The machine is about the size of a bicycle. It has casters which enable the machine to be rolled around the shop to where ever it is needed. When done, I roll it over to its parking spot next to the wall. Foot levers on the casters allow you to lower the machine to the floor so it rests solidly when in use.
Here I have my Shopsmith set up as a table saw.You can add table extensions to make the surface larger for cutting big stock, like sheets of plywood, or simply use the main table for smaller items. To cut angles, the table is rotated, not the blade as on most table saws.
Boatbuilding involves quite a bit of ripping of long stock. For that, you need an outfeed table. I built this home-made outfeed table from a piece of plywood and some scraps. It attaches quickly with no tools required. It use it frequently and it works great.
When I'm not using the outfeed table, I usually just let it hang like this.
The bottom of the outfeed table's support leg has an eyebolt in a slot. The eyebolt simply slips into a hole that I drilled in the table upright. There are a nut on the eyebolt to adjust the table so it's level, but that only needs to be done once. The upper end of the leg has a "ball and socket" joint. I made the leg this way so that the table can be raised, lowered and tilted, along with the main table without any adjustments.
Next function: the disk sander. The sanding disk can be attached at either side of the headstock. It makes quick work of sanding all those flat edges of your Navigator bulkheads straight. It can also be used like a grinder to sharpen tools. If you had a very large part to sand, you could assemble a large table using the table extensions (like I did for the table saw). The versatility of this machine seems endless.
I'd be lost without my bandsaw. It drops into two mounting holes on the left side of the machine, and then you attach it to the headstock with a coupler and you're in business. The bandsaw is powerful. It will resaw lumber up to 6" thick without a hint of bogging down. It will cut metal too, with the proper blade. When cutting long stock, again, the table extensions can be set up to provide a very long outfeed table. This is one of my favorite setups. Ideal for cutting planking!
Next, the jointer. Like the bandsaw, it drops in on the left side of the Shopsmith and connects to the headstock using the same coupler, except it connects to the high-speed port. I use the jointer to plane boards perfectly flat, such as those strips used to make the centerboard and rudder. It will plane a board about 3 1/2" wide laser straight.
I forgot to mention, the table saw, band saw, and jointer all have ports where you can attach a shop-vac to collect the shavings and sawdust as you cut.
I haven't used the lathe very much yet, but it's there when I need it. Too bad Navigator doesn't use belaying pins, they would be fun to make. I did use it to make all the nice wooden handles that you see on the machine.
To use the Shopsmith as a drill press, you first lock the headstock in place, install the table, turn it vertically and lock it, then release a locking handle and flip the headstock up vertically. This creates a far better drill press than your typical drill press. Table extensions can be used to create a very large horizontal surface for drilling large items. The table can be tilted to drill holes at precise angles. The rip fence can be used to align and clamp workpieces. I used this to drill the pivot hole through my centerboard case and centerboard perfectly straight and perfectly aligned. I also use the machine in this mode, with a Wagner Safe-T-Planer to thickness plane stock. It's not as fast as a thickness planer, but it works just about as well plus you can plane at an angle. Here is a video demonstrating the Safe-T-Planer
I also use Forstner bits to hollow out the hole for the lead in the centerboard, and the hole in the mast steps, and of course for countless routine drilling operations. I also mount a drum sander to sand interior curves. I even mounted various router bits with the large table to "machine" my rudder.
If you ever need to drill a hole in the end of something very long, or a piece that won't sit flat vertically, the horizontal boring function will come in handy. Here I am drilling a hole through the Navigator's stem for the towing eye.
I should state that, no, I don't work for Shopsmith Inc. I'm just a very satisfied customer. The thing that impresses me most about this machine is its versatility. I've even found crazy and effective ways to use the machine that its designers probably never dreamed of.
The answer is, with a Shopsmith
The Shopsmith multi-purpose tool can do all that, and a whole lot more, for a lot less than buying all of those tools seperately. Not only that, but you can buy a used Shopsmith for about the cost of only one of those tools, fix it up, use it for years, and pass it down to your grandkids someday for them to use.
The Shopsmith has been around, in various forms, since the first model 10ER built by Magna was sold by Montgomery Ward in 1947. An improved Mark II was introduced in the 1950's, followed by the Mark VII with lots of extras including the ability to tilt in both directions and included a built in vacuum. But the most popular and most versitile model is the current Mark V. Production ceased in the early 1960's due to a variety of changes within the company and the buying public, but production resumed in 1973 under a new company - Shopsmith Inc. Over 1,000,000 Shopsmiths have been sold.
The Shopsmith is built to last - essentially forever. Every part, down to the individual screws, can be ordered as replacement parts directly from Shopsmith. The entire machine is made of cast aluminum and steel. It's difficult to find a plastic part on the machine anywhere. Service manuals, operation manuals, videos, even instructions on how to refurbish a used machine are all available from Shopsmith. Compare that to most other power tools sold today. When something breaks on them, their next destination is usually the landfill.
New Shopsmith's are not cheap - not surprising for a machine built to last a lifetime. They start out at about $3,300 for the base model, but used Shopsmiths can be found, sometimes very inexpensively. I purchased my Shopsmith model 510 complete with the bandsaw and jointer accesories, for $350 from a gentleman on Craigslist. The machine was about 12 years old. It had only been used a few times before it was stored unused in a barn for about 10 years. The machine was missing some parts and parts of the machine were rusty. I paid another $150 to replace the parts that were missing or that needed replacement, and spent several days cleaning off the rust. I overhauled the headstock, following the instructional videos provided by Shopsmith. The headstock was in great shape except for one part in the speed controller. The rust on the way tubes came off pretty easily with fine sandpaper. After the overhaul I spent several hours adjusting the machine so that it cut square and true. I now have a Shopsmith which is as good as new, for $500 and about a week's worth of elbow grease.
The machine is about the size of a bicycle. It has casters which enable the machine to be rolled around the shop to where ever it is needed. When done, I roll it over to its parking spot next to the wall. Foot levers on the casters allow you to lower the machine to the floor so it rests solidly when in use.
Here I have my Shopsmith set up as a table saw.You can add table extensions to make the surface larger for cutting big stock, like sheets of plywood, or simply use the main table for smaller items. To cut angles, the table is rotated, not the blade as on most table saws.
Boatbuilding involves quite a bit of ripping of long stock. For that, you need an outfeed table. I built this home-made outfeed table from a piece of plywood and some scraps. It attaches quickly with no tools required. It use it frequently and it works great.
When I'm not using the outfeed table, I usually just let it hang like this.
The bottom of the outfeed table's support leg has an eyebolt in a slot. The eyebolt simply slips into a hole that I drilled in the table upright. There are a nut on the eyebolt to adjust the table so it's level, but that only needs to be done once. The upper end of the leg has a "ball and socket" joint. I made the leg this way so that the table can be raised, lowered and tilted, along with the main table without any adjustments.
| Ball and Socket joint |
Next function: the disk sander. The sanding disk can be attached at either side of the headstock. It makes quick work of sanding all those flat edges of your Navigator bulkheads straight. It can also be used like a grinder to sharpen tools. If you had a very large part to sand, you could assemble a large table using the table extensions (like I did for the table saw). The versatility of this machine seems endless.
I'd be lost without my bandsaw. It drops into two mounting holes on the left side of the machine, and then you attach it to the headstock with a coupler and you're in business. The bandsaw is powerful. It will resaw lumber up to 6" thick without a hint of bogging down. It will cut metal too, with the proper blade. When cutting long stock, again, the table extensions can be set up to provide a very long outfeed table. This is one of my favorite setups. Ideal for cutting planking!
Next, the jointer. Like the bandsaw, it drops in on the left side of the Shopsmith and connects to the headstock using the same coupler, except it connects to the high-speed port. I use the jointer to plane boards perfectly flat, such as those strips used to make the centerboard and rudder. It will plane a board about 3 1/2" wide laser straight.
I forgot to mention, the table saw, band saw, and jointer all have ports where you can attach a shop-vac to collect the shavings and sawdust as you cut.
I haven't used the lathe very much yet, but it's there when I need it. Too bad Navigator doesn't use belaying pins, they would be fun to make. I did use it to make all the nice wooden handles that you see on the machine.
To use the Shopsmith as a drill press, you first lock the headstock in place, install the table, turn it vertically and lock it, then release a locking handle and flip the headstock up vertically. This creates a far better drill press than your typical drill press. Table extensions can be used to create a very large horizontal surface for drilling large items. The table can be tilted to drill holes at precise angles. The rip fence can be used to align and clamp workpieces. I used this to drill the pivot hole through my centerboard case and centerboard perfectly straight and perfectly aligned. I also use the machine in this mode, with a Wagner Safe-T-Planer to thickness plane stock. It's not as fast as a thickness planer, but it works just about as well plus you can plane at an angle. Here is a video demonstrating the Safe-T-Planer
I also use Forstner bits to hollow out the hole for the lead in the centerboard, and the hole in the mast steps, and of course for countless routine drilling operations. I also mount a drum sander to sand interior curves. I even mounted various router bits with the large table to "machine" my rudder.
If you ever need to drill a hole in the end of something very long, or a piece that won't sit flat vertically, the horizontal boring function will come in handy. Here I am drilling a hole through the Navigator's stem for the towing eye.
I should state that, no, I don't work for Shopsmith Inc. I'm just a very satisfied customer. The thing that impresses me most about this machine is its versatility. I've even found crazy and effective ways to use the machine that its designers probably never dreamed of.
Subscribe to:
Posts (Atom)